The most devastating failure of a Cherry Delight Pie is Structural Collapse, where the once-distinct layers of graham cracker, sweetened cream, and cherry topping dissolve into a pink, soupy puddle upon slicing. This “soupy slice” occurs when the stabilization of the dairy layer fails or the crust lacks the integrity to hold the weight of the fruit. This guide will diagnose every failure mode, from the “Soggy Bottom” to “The Lumpy Emulsion,” ensuring your next attempt results in a clean-cut, professional-grade dessert.
What Perfect Cherry Delight Pie Actually Looks, Feels, and Tastes Like
Before you begin, you must understand the benchmark. A successful Cherry Delight is not a “pudding”; it is a layered dessert with structural integrity and a specific sequence of textures.
| Stage | Success marker — what you should see / feel / smell / hear |
|---|---|
| The Crust (Pre-bake) | Texture of wet beach sand; smells deeply of toasted honey; internal temp of 175°C during the short set-bake. |
| The Cream Base | A velvety, matte-finish white clouds; no visible grains of sugar; stiff enough to hold a “peak” when the spatula is lifted. |
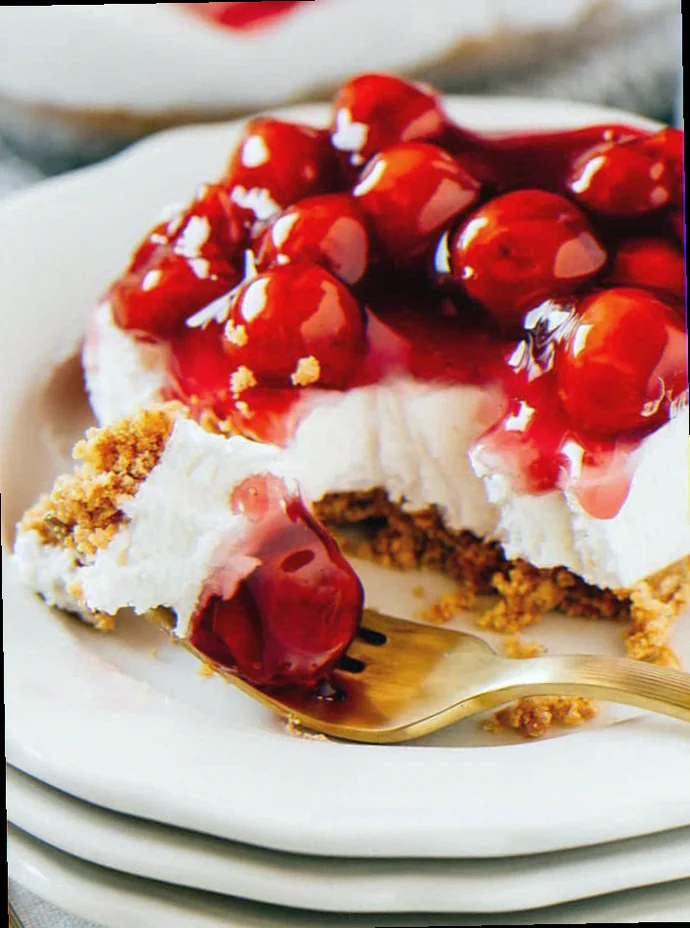
| The Assembly | Sharp, distinct horizontal lines between the golden crust, the white cream, and the ruby cherries. No “bleeding” between layers. |
| The Slice | The knife meets slight resistance at the crust, then glides through the cream. The slice stands upright on the plate without slumping for at least 30 minutes. |
| The Palate | First, the tartness of the cherry; second, the lactic tang of cream cheese; finally, the salty-sweet crunch of the buttered crumb. |
The Ingredient Failures — Wrong Choices Before You Even Start Cooking
Most failures are baked into the grocery cart. If you start with the wrong chemical composition, no amount of technique can save the structure.
- The “Watery Slump” (Dairy Failure): caused by using “spreadable” or low-fat cream cheese from a tub → fix: Use only full-fat, block-style cream cheese. Tub versions contain higher water content and stabilizers that prevent the pie from setting firm.
- The “Soggy Foundation”: caused by using margarine or “buttery spreads” with high water content → fix: Use high-quality unsalted butter (minimum 80% butterfat). The fat must solidify completely in the fridge to “glue” the crumbs together.
- The “Artificial Sludge” Aftertaste: caused by low-grade canned cherry filling with excess cornstarch thickener → fix: Select a “Premium” or “More Fruit” designated filling, or better yet, use a tart cherry preserve lightened with a splash of lemon juice to cut the cloying sweetness.
- The “Grainy Mouthfeel”: caused by using granulated sugar in the cream layer → fix: Use sifted powdered (confectioners’) sugar. It contains a small amount of cornstarch which aids in stabilization and dissolves instantly into the fat.
The Technique Failures — What Goes Wrong During Cooking
Execution errors usually involve temperature mismanagement or over-working the delicate emulsions.
- The Lumpy Emulsion: The cream layer is filled with tiny, hard beads of cheese → caused by mixing cold cream cheese with other ingredients → fix: Ensure cream cheese is exactly 21°C (room temperature) before beating. If it’s cold, it will never emulsify with the whipped topping.
- The Crust Shatter: The crust turns to dust when you try to slice it → caused by insufficient compression or skipping the “set-bake” → fix: Use the flat bottom of a measuring cup to pack the crumbs with significant force, then bake at 175°C for exactly 8 minutes to caramelize the sugars and lock the structure.
- Syneresis (The Weeping Layer): A layer of water forms between the cream and the cherries → caused by spreading warm cherry filling onto the cream layer → fix: Chill the cherry topping to 4°C in the refrigerator before it ever touches the cream layer.
- The “Bleeding” Effect: Red streaks ruin the white cream layer → caused by over-working the cherry topping during spreading → fix: Drop the filling in small dollops across the surface, then use an offset spatula to gently “bridge” the gaps rather than dragging the fruit across the cream.
The Equipment Failures — When Your Tools Are the Problem
- The Reactive Pan: Using an unlined aluminum pan can cause a metallic “tinny” taste when it reacts with the acidic cherry filling. Fix: Use a glass (Pyrex) or ceramic 9x13 inch dish. Glass allows you to see if the crust has browned evenly.
- The Balloon Whisk: Using a manual whisk for the cream cheese layer usually results in “The Lumpy Emulsion.” Fix: Use a stand mixer with the paddle attachment or an electric hand mixer. You need the shearing force to break down the fat globules in the cheese.
- The Dull Knife: A standard serrated bread knife will tear the crust and smear the layers. Fix: Use a thin-bladed chef’s knife dipped in hot water and wiped dry between every single cut.
The Full Recipe — Built Around Preventing Every Failure Above
This recipe is calibrated to eliminate the “Structural Collapse” failure.
- Graham Cracker Crumbs — 250g — Precise weight ensures the crust isn’t too thin to support the weight of the cherries.
- Unsalted Butter (Melted) — 115g — High fat content acts as the structural “glue” once chilled.
- Granulated Sugar (for crust only) — 50g — Provides the “snap” and caramelization during the set-bake.
- Full-Fat Block Cream Cheese — 450g (two 8oz blocks) — Must be at 21°C to prevent “The Lumpy Emulsion.”
- Powdered Sugar (Sifted) — 120g — Prevents “The Grainy Mouthfeel.”
- Stabilized Whipped Topping (or Heavy Cream with Stabilizer) — 225g — Provides the “cloud” texture without collapsing.
- Vanilla Bean Paste — 5ml — The oils in the paste provide better flavor suspension than alcohol-based extracts.
- Cherry Pie Filling — 600g — Must be chilled to 4°C to prevent “Syneresis.”
Method:
- Pulse and Pack: Combine crumbs, melted butter, and granulated sugar. Press into the glass dish with 5lbs of pressure using a flat tool — prevents “The Crust Shatter” — success marker: The surface should look like a solid, unmoving sheet of dark sand.
- The Set-Bake: Bake at 175°C for 8–10 minutes. This melts the sugar and butter into the crumbs — prevents “The Soggy Bottom” — success marker: The kitchen should smell like toasted biscuits; edges should be one shade darker than the center. CRITICAL: Cool completely to room temperature before adding dairy.
- The Cream Shearing: Beat the room-temperature cream cheese and powdered sugar for 3 minutes on medium-high — prevents “The Lumpy Emulsion” — success marker: The mixture should look like glossy white spackle with no visible yellow clumps.
- The Gentle Fold: Using a rubber spatula, fold the whipped topping into the cream cheese in a figure-eight motion — prevents “The Watery Slump” — success marker: A light, airy mixture that holds its shape on the spatula.
- The Cold Bridge: Spread the cream mixture over the cold crust. Then, carefully dollop the chilled cherry filling on top — prevents “The Bleeding Effect” — success marker: A sharp, clean white line visible through the side of the glass dish.
- The Mandatory Cure: Chill for a minimum of 4 hours, preferably 12 — prevents “Structural Collapse” — success marker: The center of the pie should not jiggle when the pan is lightly shaken.
How to Rescue Cherry Delight Pie When It Has Already Gone Wrong
- If the cream layer is lumpy: If you haven’t folded in the whipped topping yet, microwave the mixture for 10 seconds to slightly soften the fat, then beat on high speed. If you have already added the whipped topping, you cannot beat it further or it will collapse; instead, pass the entire mixture through a fine-mesh sieve to remove the lumps.
- If the crust is stuck to the pan: This happens if the butter “glued” to the glass. Briefly wrap the bottom of the pan in a warm, damp towel for 60 seconds. This slightly softens the butter at the contact point, allowing the slice to release.
- If the pie is too soft to slice: This is a catastrophic failure of setting. Do not try to slice it. Instead, place the dish in the freezer for 45 minutes. Serve it as a “Frozen Cherry Delight.” It will be firmer and more like an ice cream cake, which saves the presentation.
Make-Ahead: Which Failures This Introduces and How to Avoid Them
The primary failure of make-ahead Cherry Delight is The Fridge Taint. The high fat content in the cream cheese and butter acts as a sponge for odors in your refrigerator (onions, leftovers).
- The Fix: Use a dish with a snap-on airtight lid, or double-wrap with plastic wrap and a final layer of aluminum foil.
- The Crust Softening: After 48 hours, the moisture from the cream will inevitably migrate into the crust. To prevent a “Soggy Bottom,” serve the pie within 24 hours of assembly. If you must make it further in advance, prepare the crust and cream layer, but do not add the cherry topping until 1 hour before serving.
Related topics: Homemade pecan pie cookies recipe · Waitrose cottage pie recipe · Hershey bar with almonds pie recipe
Diagnostic FAQ
My pie turned out “soupy” even though I used block cream cheese. What happened?
You likely over-beat the mixture after adding the whipped topping. Once the whipped topping (the aerated component) is added, you must switch from a mixer to a hand spatula. Over-mixing breaks the air bubbles and turns the “cloud” back into liquid.