The most devastating failure in coconut custard pie filling is the Structural Collapse, where the filling appears set in the pan but dissolves into a weeping, milky pool the moment a wedge is sliced. This “weeping” or “slumping” occurs when the protein bonds and starch networks fail to lock together, resulting in a texture that feels more like a thick soup than a sliceable dessert. This guide will diagnose every stage of the process to ensure your custard achieves a clean, architectural slice with a velvety mouthfeel.
What Perfect Coconut Custard Filling Actually Looks, Feels, and Tastes Like
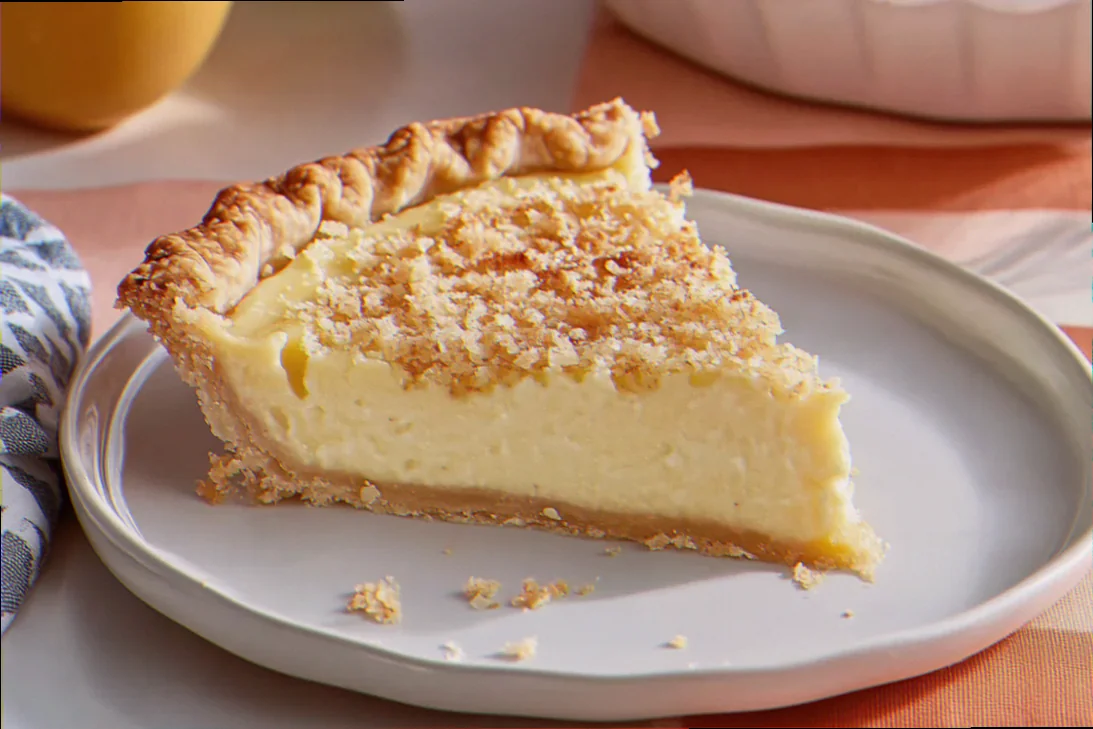
Before you can fix a failure, you must recognize the sensory benchmarks of a successful custard. The goal is a “Short-Set” custard: firm enough to hold a sharp edge when cut, but delicate enough to melt on the tongue without being rubbery.
| Stage | Success marker — what you should see / feel / smell / hear |
|---|---|
| Before Cooking | A pale, ivory slurry with no visible dry clumps of starch; it should smell intensely of vanilla and toasted coconut. |
| During Cooking | The mixture transitions from a watery liquid to a heavy, glossy “ribbon” stage at approximately 82°C–85°C. It should coat the back of a metal spoon thickly. |
| At the Finish | A smooth, heavy cream consistency that holds a “track” when you run your finger through the coating on the spoon. It should smell like cooked sugar and warm milk. |
| When Serving | The custard provides a clean, vertical break when cut with a fork. It feels cold, fatty, and rich, followed by the textural chew of the coconut. |
The Ingredient Failures — Wrong Choices Before You Even Start Cooking
A custard is a delicate balance of hydration, fat, and protein. If your ingredients are off-spec, the chemistry of the set will fail regardless of your technique.
- The Oily Separation: caused by using High-Fat Canned Coconut Milk (designed for curries) instead of a blend of whole dairy milk and coconut extract. → fix: Use a ratio of 75% whole dairy milk (3.5% fat) and 25% coconut cream or milk to maintain emulsion stability.
- The Moisture Migration (Soggy Crust): caused by using Sweetened “Angel Flake” Coconut, which contains propylene glycol (a humectant) that draws water out of the custard and into the crust. → fix: Use unsweetened desiccated coconut or medium-shred unsweetened coconut for a stable, predictable moisture content.
- The Grainy Mouthfeel: caused by Granulated Sugar with Large Crystals that fail to dissolve before the eggs reach coagulation temperature. → fix: Use fine baker’s sugar (caster sugar) or ensure the sugar is whisked into the cold milk/egg base thoroughly before applying heat.
The Technique Failures — What Goes Wrong During Cooking
Custard is a thermal race. If you move too fast, the eggs scramble; if you move too slow, the starch never “blooms.”
- The Scrambled Curdle: what it looks like: tiny yellow specks of cooked egg white floating in thin liquid → caused by Thermal Shock (adding hot milk directly to cold eggs) → fix: Slowly “temper” the eggs by whisking in only 50ml of hot milk at a time until the egg mixture is warm to the touch before returning the whole batch to the pot.
- The Starch Stall: symptom: the pie looks set in the fridge but becomes liquid at room temperature → cause: Alpha-Amylase Failure. Human saliva or undercooked egg yolks contain enzymes that eat starch. → fix: The custard must reach a gentle boil (approx. 95°C) for at least 60 seconds to neutralize these enzymes and fully hydrate the cornstarch.
- The Rubbery Skin: symptom: a tough, leathery layer on top of the pie → cause: Evaporative Oxidation during the cooling phase. → fix: Press plastic wrap (cling film) directly onto the surface of the hot custard so there is zero air gap while it cools.
- The Greasy Leak: symptom: a layer of clear oil on the surface → cause: Over-whisking the custard after it has begun to set, which breaks the delicate fat-protein emulsion. → fix: Use a folding motion with a silicone spatula once the custard thickens, rather than a violent whisking action.
The Equipment Failures — When Your Tools Are the Problem
Custard is sensitive to “hot spots.” Using the wrong vessel will lead to localized failure.
- Thin-Bottomed Aluminum Pots: causes Localized Scorching where the custard burns at the edges while the center remains raw. → fix: Use a heavy-bottomed stainless steel “tri-ply” saucepan or a double boiler. The mass of the pan acts as a thermal buffer.
- The Balloon Whisk Trap: using a whisk during the final thickening stage incorporates too much air, leading to Foamy Voids in the slice. → fix: Switch to a silicone heat-resistant spatula (spoonula) once the mixture reaches 70°C to ensure you are scraping the bottom of the pan where burning occurs.
- The Guesswork Failure: relying on “it looks thick” rather than a thermometer. → fix: Use an Instant-Read Digital Thermometer. Without one, you cannot distinguish between “thickened by heat” and “thickened by starch activation.”
The Full Recipe — Built Around Preventing Every Failure Above
This recipe utilizes the “Stovetop-to-Chilled” method to ensure maximum structural stability.
- Whole Milk — 500ml — High protein/fat ratio prevents syneresis (weeping).
- Cornstarch — 40g — Precisely measured to ensure a “short” sliceable set.
- Egg Yolks — 4 Large (approx. 72g) — The primary emulsifier; prevents the coconut fats from separating.
- Fine Caster Sugar — 150g — Dissolves quickly to prevent grittiness.
- Unsweetened Shredded Coconut — 100g — Provides texture without introducing chemical humectants.
- Unsalted Butter (Cold) — 30g — Added at the end to “mount” the sauce, providing a glossy finish and extra stability.
- Vanilla & Coconut Extract — 5ml each — Prevents the “Flavor Void” by reinforcing the coconut profile.
Method:
- Slurry Formation: Whisk the sugar and cornstarch in a cold saucepan before adding any liquid. — Prevents “Starch Lumps.” — success marker: A uniform, sandy powder.
- The Liquid Base: Slowly whisk in the milk and egg yolks while the mixture is cold. — Prevents “Egg Rags” (prematurely cooked egg bits). — success marker: A smooth, pale yellow liquid with no streaks.
- Thermal Activation: Heat over medium-low, stirring constantly with a spatula. — Prevents “Bottom Scorch.” — success marker: Steam begins to rise at 65°C.
- The Thickening Point: Continue stirring until the first bubble breaks the surface. — Prevents “The Slump” by ensuring starch is activated. — success marker: The mixture will suddenly resist the spatula and become glossy at 90°C–95°C.
- The Finishing Mount: Remove from heat and stir in the cold butter and coconut. — Prevents “The Greasy Separation” by emulsifying the fat into the cooling starch. — success marker: The butter disappears, leaving a mirror-like sheen.
- The Air-Lock Seal: Pour into a pre-baked shell and immediately apply plastic wrap to the surface. — Prevents “The Rubbery Skin.”
How to Rescue Coconut Custard When It Has Already Gone Wrong
- If the custard is lumpy: Immediately pass the hot custard through a fine-mesh sieve into a clean bowl. This removes “egg rags” and starch clumps. It will be a 90% recovery; the texture will be saved, though the volume may slightly decrease.
- If it won’t thicken after 10 minutes: Mix 1 tablespoon of cornstarch with 2 tablespoons of cold milk (a slurry). Whisk this into the simmering custard and cook for another 2 minutes. This is a full recovery.
- If it has “broken” (looks curdled/oily): This is a catastrophic emulsion failure. Remove from heat and vigorously whisk in 1 tablespoon of cold heavy cream. If that fails, an immersion blender can sometimes re-emulsify the fats, though it will destroy the texture of the coconut shreds.
Make-Ahead: Which Failures This Introduces and How to Avoid Them
The primary failure of make-ahead custard is Crust Softening. Over 24 hours, the moisture in the custard will naturally migrate into the pastry.
- Prevention: “Blind-bake” your pie crust until it is fully cooked and golden. Before adding the filling, brush the inside of the crust with a thin layer of melted white chocolate or cocoa butter. This creates a hydrophobic barrier that prevents the custard from making the crust soggy.
- Storage: Store at 4°C for no more than 3 days. Do not freeze; freezing coconut custard destroys the starch bonds, leading to a grainy, watery mess upon thawing.
Related topics: Vanilla whoopie pie filling recipe · Recipe for bottled apple pie filling · Best tasting apple pie filling recipe
Diagnostic FAQ
My filling turned out “rubbery” or “bouncy” — what went wrong?
You likely used too much cornstarch or overcooked the custard past 98°C. This creates a “gelatinous” texture rather than a “creamy” one. Next time, weigh your starch in grams rather than using volume measurements.
It looked perfect in the pot but is “soupy” after 4 hours in the fridge — why?
This is “Alpha-Amylase” contamination. If you tasted the custard with a spoon and then put that spoon back in the pot, or if you didn’t bring the custard to a full boil, the enzymes in your saliva or the eggs stayed alive and ate the starch bonds while the pie sat in the fridge.
The flavor is “flat” even though I added coconut — where did I go wrong?
Fat mutes flavor. If you used high-fat coconut cream without enough salt or acid, the coconut flavor will feel “blocked.” Add a pinch of sea salt and 1/4 teaspoon of lemon juice to the filling to “brighten” the coconut notes without making it taste like lemon.